First Look: My Working Prototype for Publishing a Queue
By Manny V | July 19, 2025 | #Prototype #QMSDevelopment
After tackling the complexities of tech stack selection, branding, and even the unexpected rabbit hole of SPA security, I'm thrilled to share a tangible milestone in the development of QFlowPro.com: the initial working prototype for the core flow of Publishing a Queue. This is where the theoretical discussions start to manifest into a functional reality, even if it's still in its early Proof of Concept (PoC) stage.
My aim for this prototype was to create a straightforward, intuitive process for a business or solo professional to set up their queue and immediately make it accessible to their clients. Let's walk through the initial steps and what it looks like.
1. Creating Your Queue: Simplicity First
The first step for any user is to create a new queue. Keeping in mind the goal of a low barrier to entry and ease of use, the initial interface for queue creation is designed to be as simple as possible.
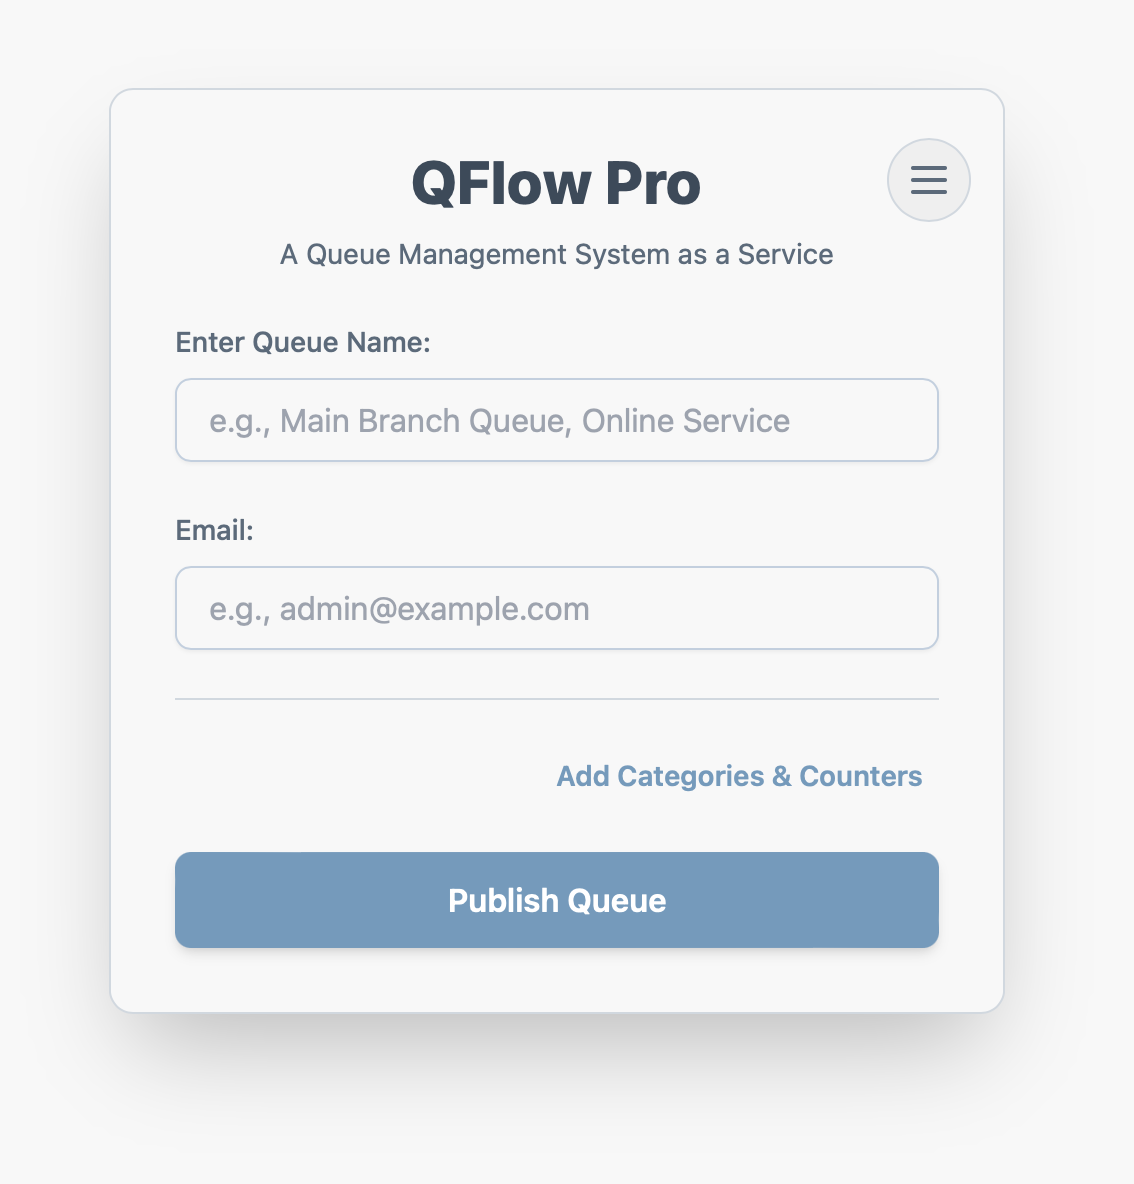
Figure 1: Initial Queue Creation Interface - Categories and Counters hidden.
As you can see in Figure 1, initially, advanced options like managing specific categories and counters are hidden. This keeps the interface clean and prevents overwhelming new users. The idea is to let them get a basic queue up and running quickly.
However, for businesses that need more granular control (as discussed in my post about diverse industry needs), these options are readily available.

Figure 2: Queue Creation Interface with Categories and Counters visible.
Figure 2 shows the expanded view, where users can define multiple service categories and assign them to specific counters. This addresses the need for flexibility that many businesses, from banks to government offices, require.
Just for fun, and to test out some UI capabilities, I also implemented a simple theme settings feature. This allows users to change the color scheme between light and dark modes, offering a degree of personalization right from the start. It's a small detail, but it contributes to a more pleasant user experience.
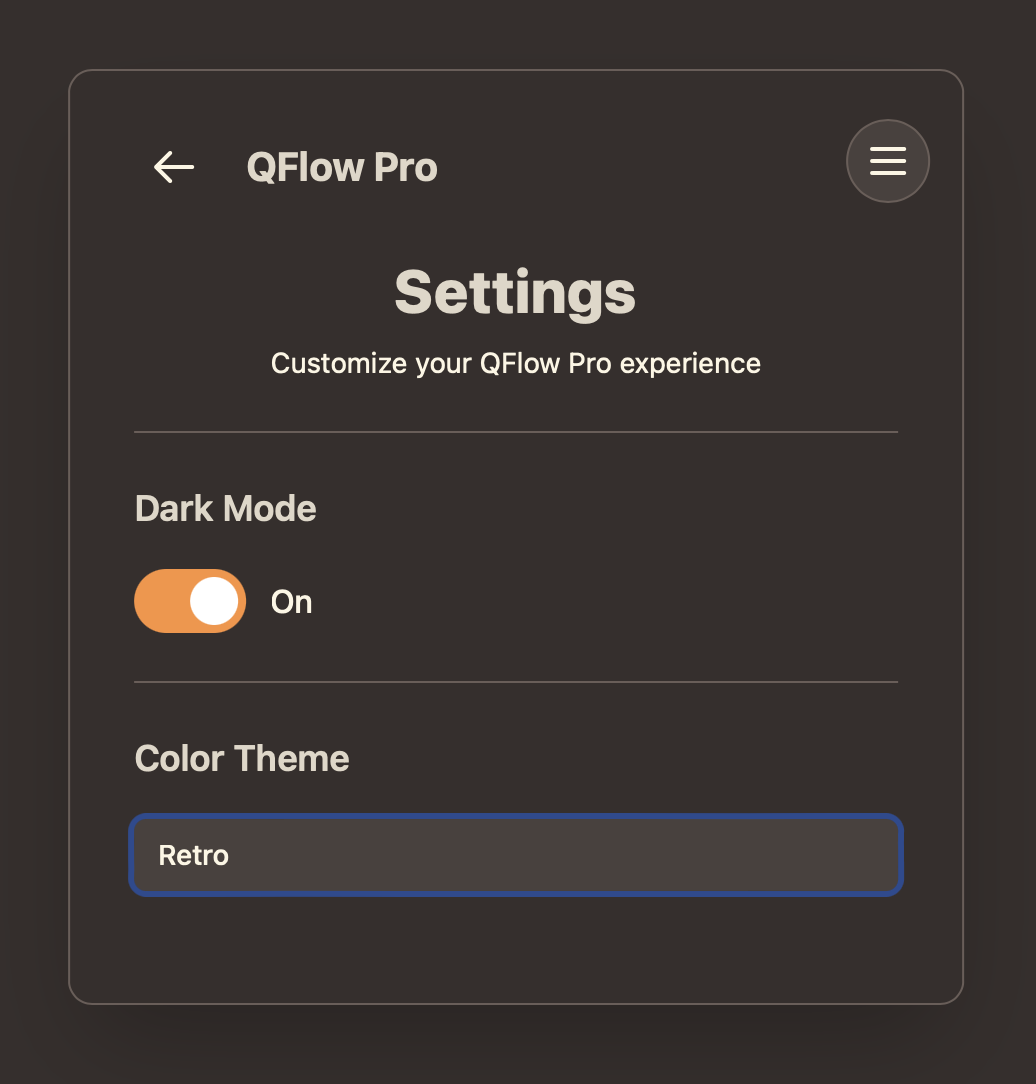
Figure 3: Simple Theme Settings for color scheme and mode.
2. Publishing Your Queue: Instant Access
Once the queue is created and configured, the next logical step is to "publish" it, making it live and accessible. This is designed to be as seamless as possible, providing immediate tools for the business to get started.
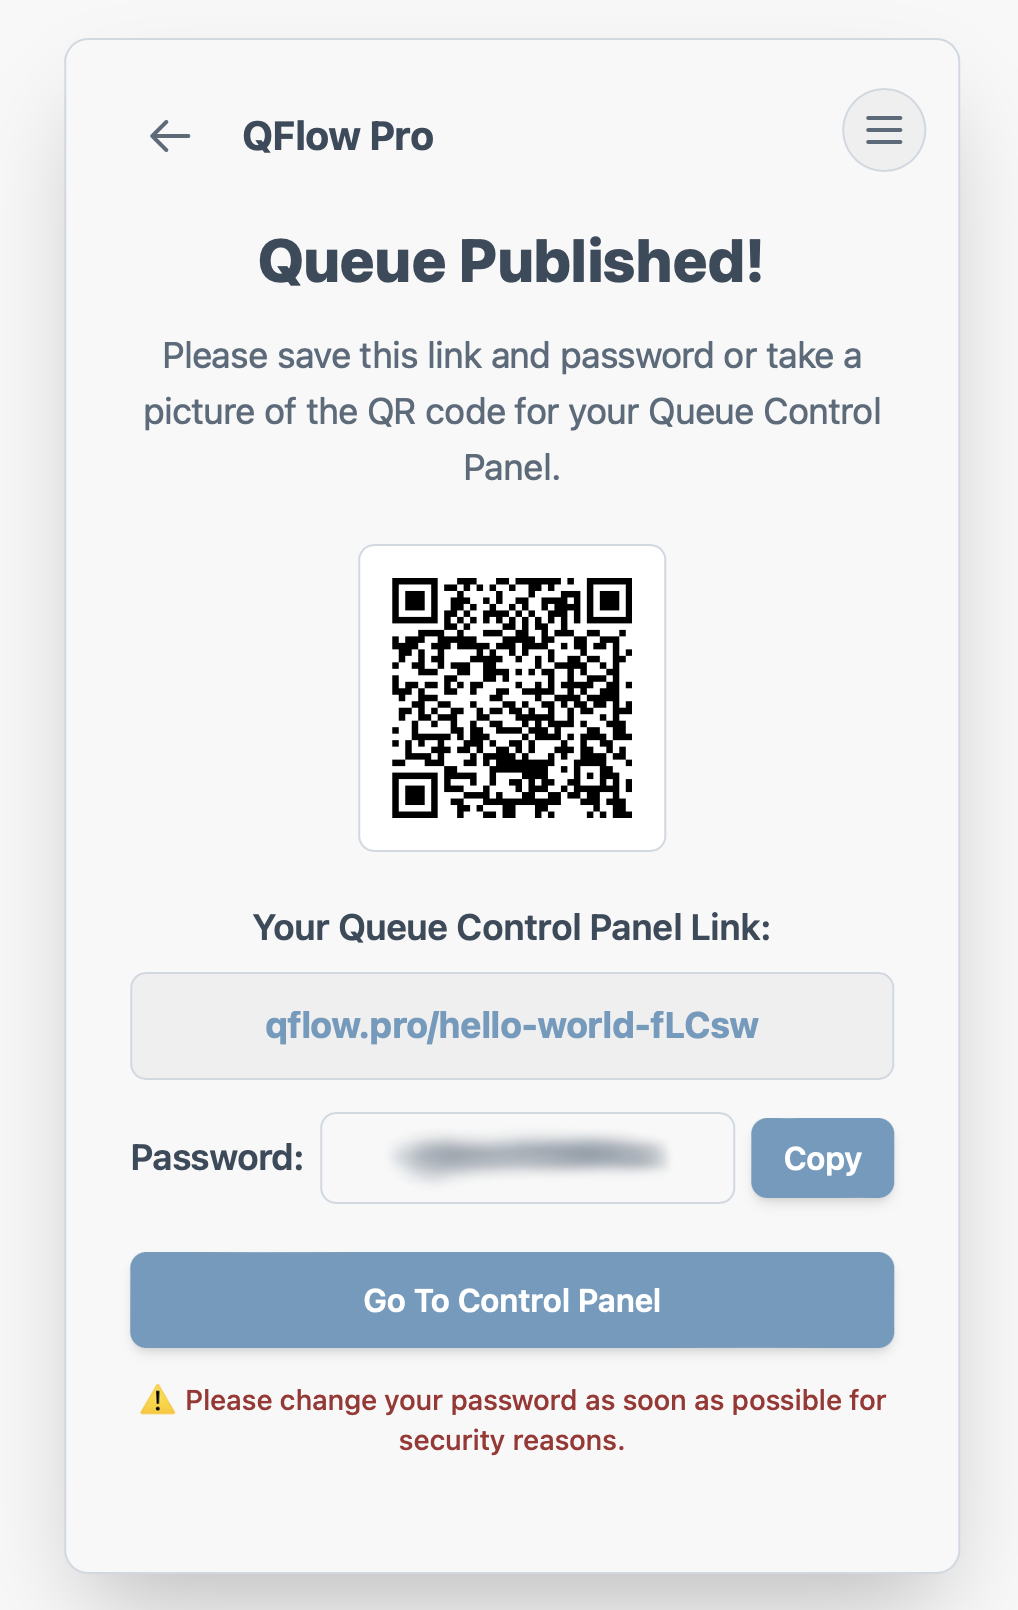
Figure 4: Published Queue with QR Code and Control Panel Link.
As shown in Figure 4, upon publishing, the system immediately generates a unique QR code. This QR code is a central component of the low-barrier-to-entry strategy: a business can simply display this QR code (e.g., print it out, show it on a tablet) for clients to scan with their smartphones to join the queue. No complicated URLs to type, no app downloads required for the client initially.
Alongside the QR code, the system provides a direct link to the control panel, accompanied by a temporary admin password. This ensures that the business owner or manager can immediately access and manage their newly created queue. The temporary password emphasizes security, prompting the user to set a more permanent one later.
3. The Control Panel: Your QMS Command Center
The control panel is the central hub for managing all aspects of the queue. It's designed to provide quick access to the various interfaces needed by different stakeholders within the business.
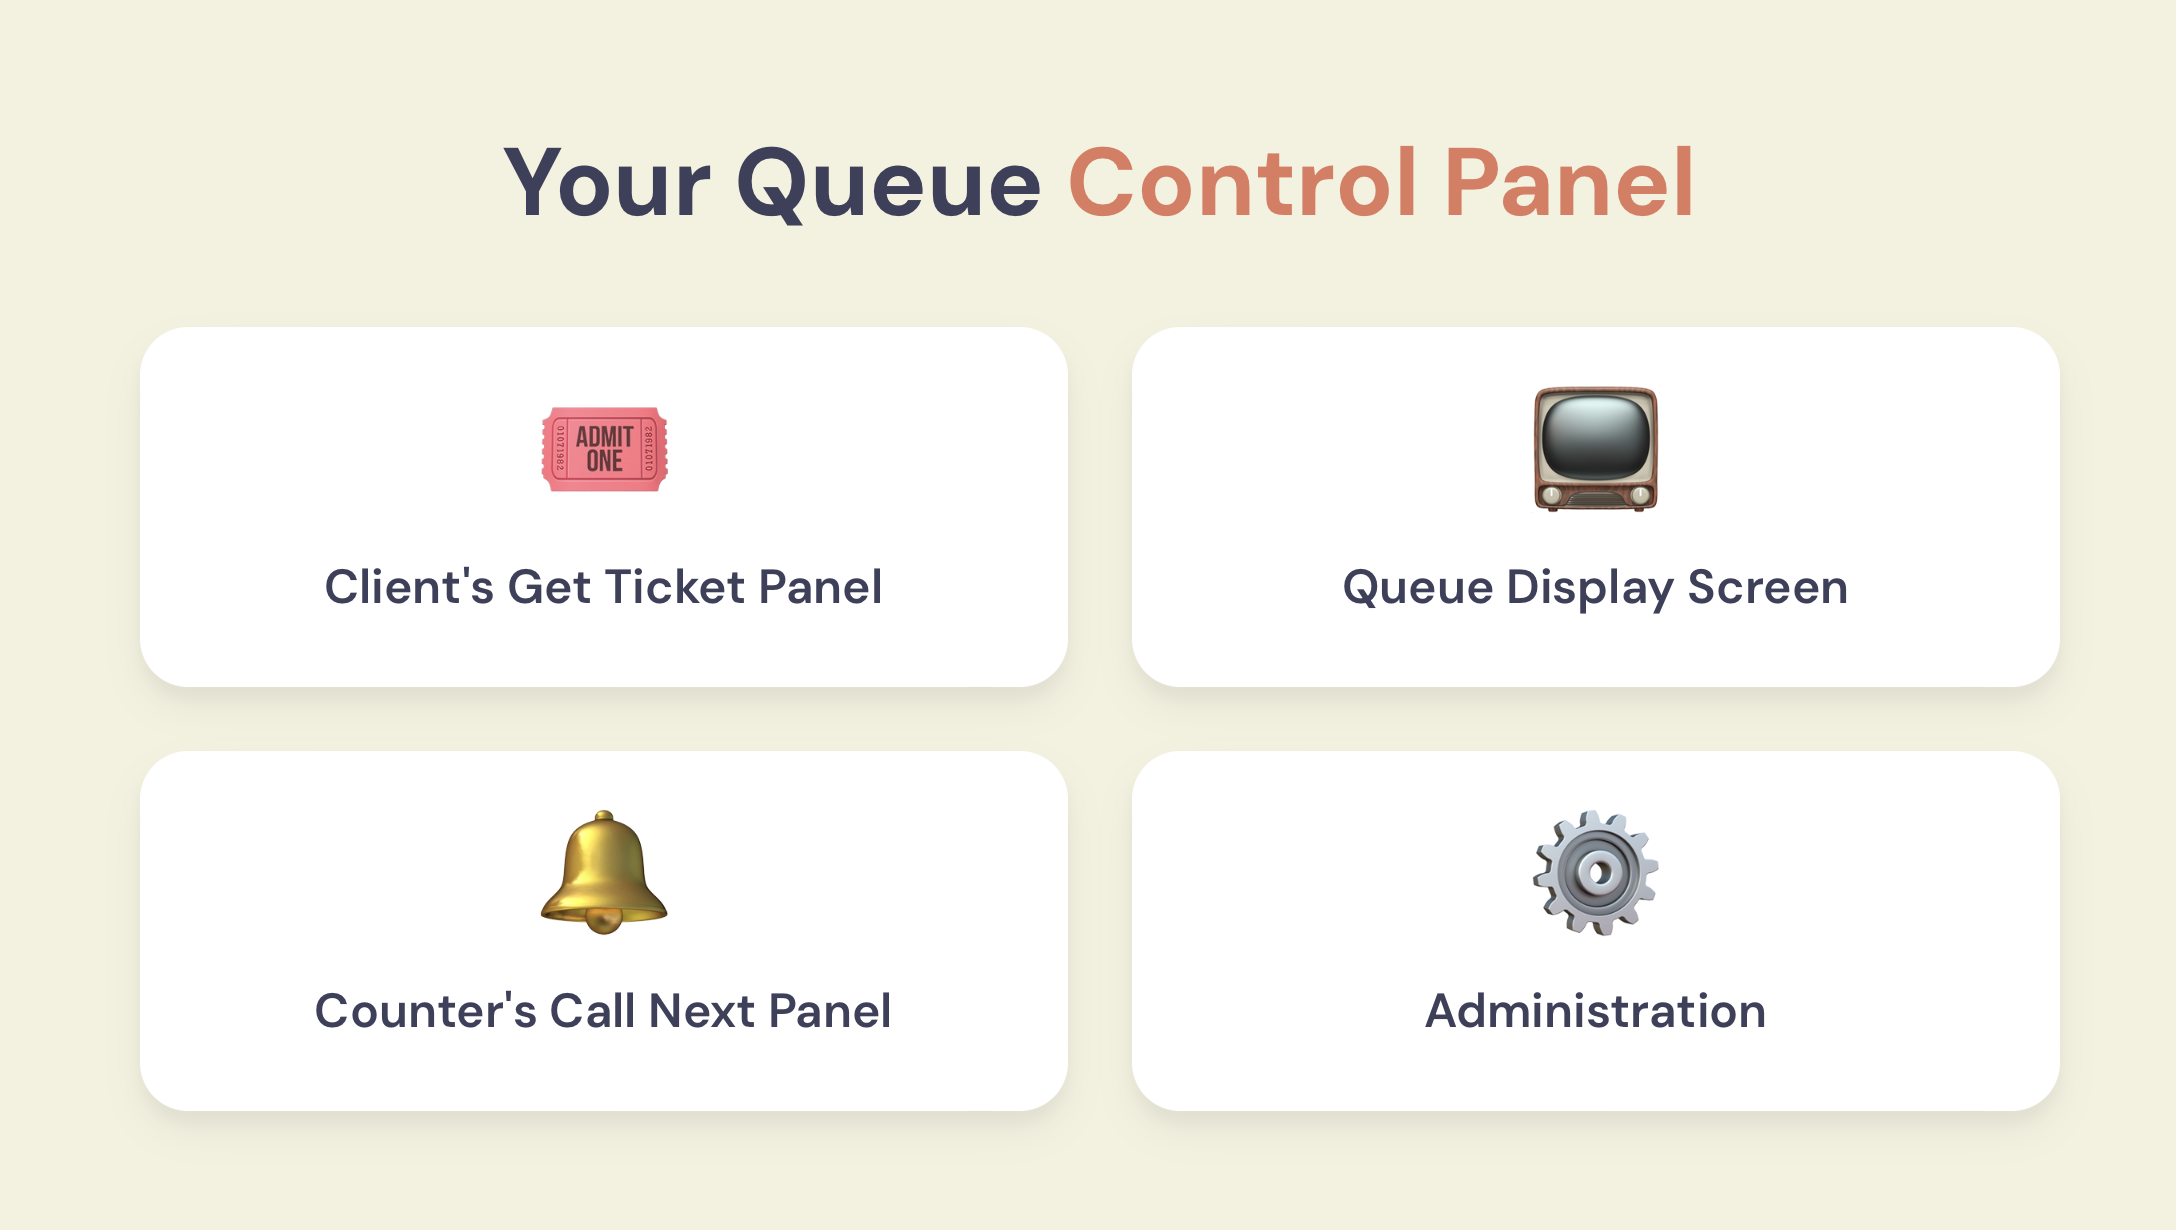
Figure 5: The QMS Control Panel interface.
From this control panel (Figure 5), you can access:
- Client's Get Ticket Panel: This is the interface customers will use to join the queue, either by scanning the QR code or directly accessing a URL.
- Queue Display Screen: The public-facing screen that shows the "Now Serving" number and other relevant queue information. This can be displayed on any monitor or TV.
- Counter's Call Next Panel: The interface used by service agents or counter staff to call the next customer in line, manage their specific queue, and mark services as complete.
- Administration Settings: Where the business owner can manage queue settings, user accounts, view analytics, and configure other aspects of their QMS.
This centralized access point simplifies management, ensuring that all necessary tools are just a click away.
The Road Ahead: From PoC to Fully Functional
This initial working prototype for publishing a queue is a significant step forward. It validates the core concept and demonstrates the user flow from creation to initial access. However, it's important to remember that this is still a Proof of Concept and will continue to be improved.
The next set of prototypes will focus on making each of the functionalities within the control panel fully working. This means building out the real-time updates for the queue display, implementing the logic for agents to call next, and developing the client-side ticket acquisition process. It's a big undertaking, but seeing these initial screens come to life is incredibly motivating.
Stay tuned for more updates as we continue to build QFlowPro.com, one functional piece at a time!